
Introduction
Recently, I began studying for my AWS Solutions Architect Associate course. One of the topics covered was the many features of S3, and since I had recently set up my own domain using Route53, I thought it might be a good idea to get my website finally out there on the internet. I had a website built using Astro and Typescript for a while now, but had not gotten around to polishing it until this topic came up. This will not be a tutorial on building a website, but rather a relatively easy way to deploy a static website using AWS services.
I’m sure this topic has been covered extensively before, but I think writing something will hopefully add a unique perspective for someone else, while also allowing me to gain a greater understanding. This is my first blog post so it definitely will not be exhaustive and may not be perfect. Any suggestions would be appreciated.
Prerequisites
To follow this tutorial, you should have a domain set up as well as a static site. I used Route53 to set up my domain and Astro as my static site generator but there are a lot of options out there. You should also have an AWS Account. While this can cost money, this tutorial is completely possible to do in the free tier.
Tech Stack
This will be a quick introduction to the technologies I used in AWS to create this website.
S3
S3 (simple storage service) is a scalable object storage software as a service that stores data as key-content pairs, allowing each of these objects to be uniquely addressed. For a simple use case, you could use it to host your resume (or any file) that anyone with internet access, the URL, and the right permissions can access. It doesn’t quite work like a file system, but for the purposes of this project, that is a fine abstraction.
Each S3 instance is known as a bucket, and this contains all of the files that will be used to run your site. For this project, we will be creating a publicly accessible S3 bucket, and configuring to server our content. S3 allows you to store HTML, CSS and other web content, so if you have a static site, you can host it using S3 for a relatively low cost.
Route53
DNS can be a very complex topic so I will only include what is necessary. Basically this service will allow people to find our website by typing in a URL. Route53 is a DNS web service by Amazon that has a few key functions. The ones we are interested in are domain registration and DNS routing. This will be used to set up routing to our static site. We will also be setting up a certificate usnig AWS Certificate Manager. For the purposes of this tutorial, I will assume you already have a domain set up.
CloudFront
CloudFront is a content delivery network that we will use as a proof of concept for enhancing the security and performance of our static site. It basically places our content in edge locations to speed up delivery to different geographical regions.
Setting Up AWS Account and S3
The AWS Account
Now we will start actually using the AWS Console. Assuming you have an AWS account, first you will need to login. While this seems like a simple topic, best practices for AWS accounts actually can get quite complex. But for this tutorial, adhering to a few simple principles should for the most part be fine. These practices are listed as follows.
-
Don’t build off of the root account. When you first make an account, this will be the root account. Generally for security purposes, it’s not recommended you build on the root account as it is impossible to restrict a root account’s permissions. Instead, it’s generally recommended to create an account with AdministratorAccess to work off of as well as production and development accounts. This can get complicated very quickly so I won’t explain the entire process here but for security that’s usually a good practice.
-
Use MFA. Multi-factor authentication applies to many things but this is important as if someone gains access to your credentials, you can get billed if they use your account.
-
Set a Basic Budget Alert. While this project is unlikely to incur any high costs beyond the cost of the domain, this is always a good idea so you are notified in case.
A more comprehensive list of best practices can be found here.
Configuring S3
To start, make sure you are on your admin account if you followed the guide and elected to set up an account properly.
AWS also operates based on zones, so make sure you have the proper region selected. I will be using us-east-1. You can find this at the top of the page in the web UI.
Creating a Bucket
Now, we will set up a bucket and enable a feature that allows S3 to act as a web server and serve our pages to the internet. Essentially it allows people to access the bucket as they would any other website, through a web browser.
Now we will go into the S3 Console and create a bucket. This should take you to a screen that looks like this.
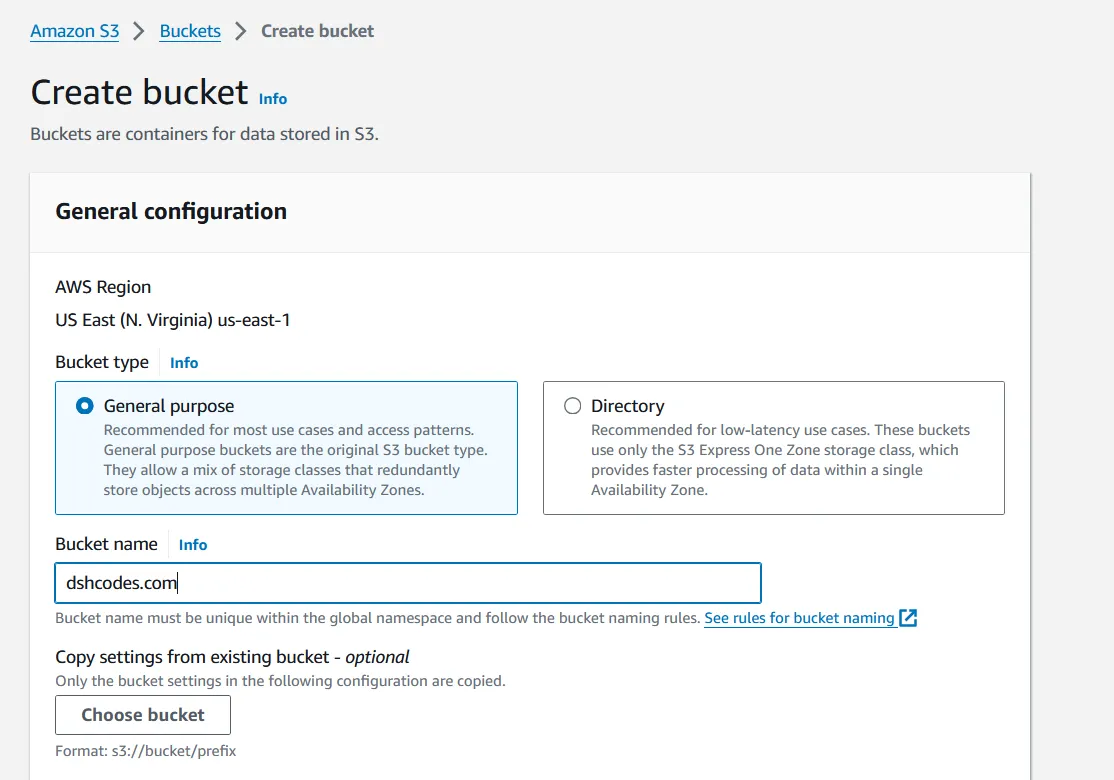
A few things to note here.
- S3 Bucket names need to be globally unique, so whatever you choose to name your bucket cannot be already in use by you or anyone else.
- If you have a domain registered, the bucket name you choose should be the DNS formatted string of your domain name. For me, that would be dshcodes.com
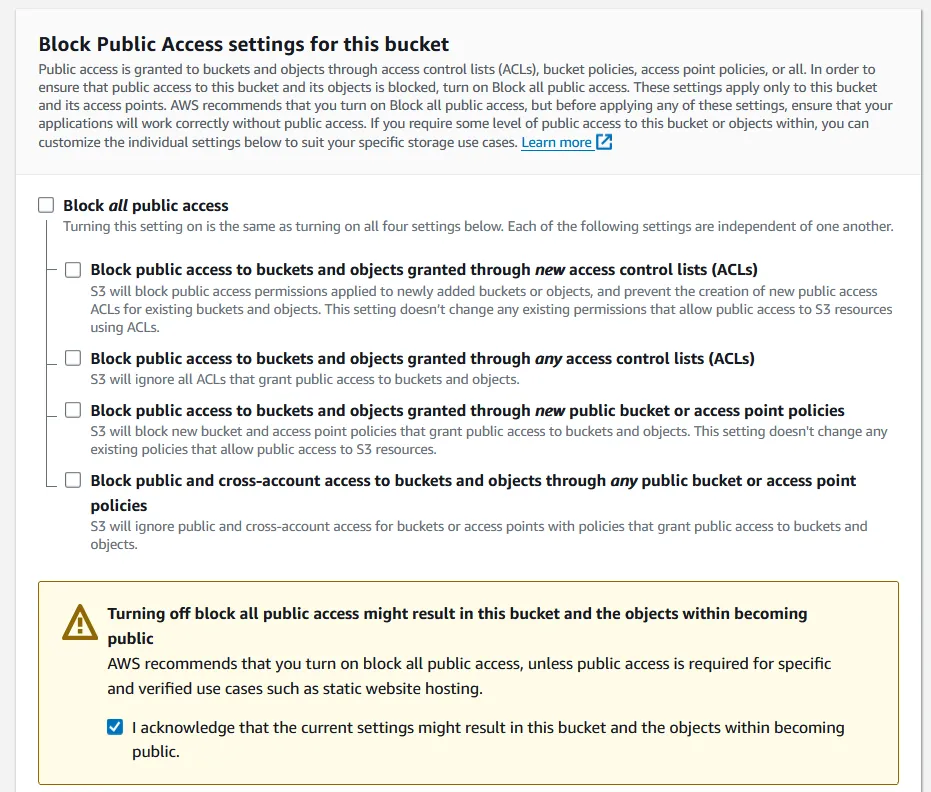
Then we should uncheck the box that blocks all public access. Due to many past security incidents, this is enabled by default but we can uncheck it and click the acknowledgement because we want this to be publicly accessible and our website will not contain any sensitive information.
We will leave everything else as default and finish creating the bucket.
Bucket Configuration
Now we need to configure the bucket to act as a web server. We will do this by enabling static site hosting. Let’s click on the bucket we just created.
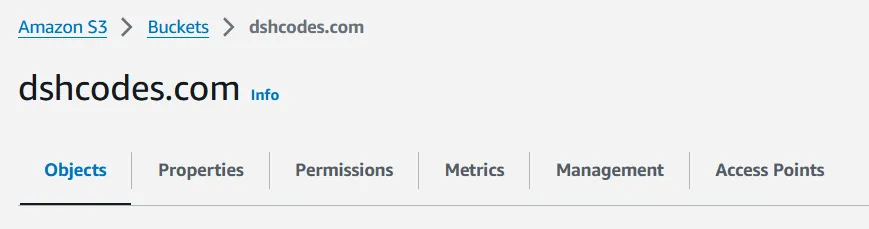
From this screen, we will select the properties tab, and scroll all the way down to enable static website hosting.
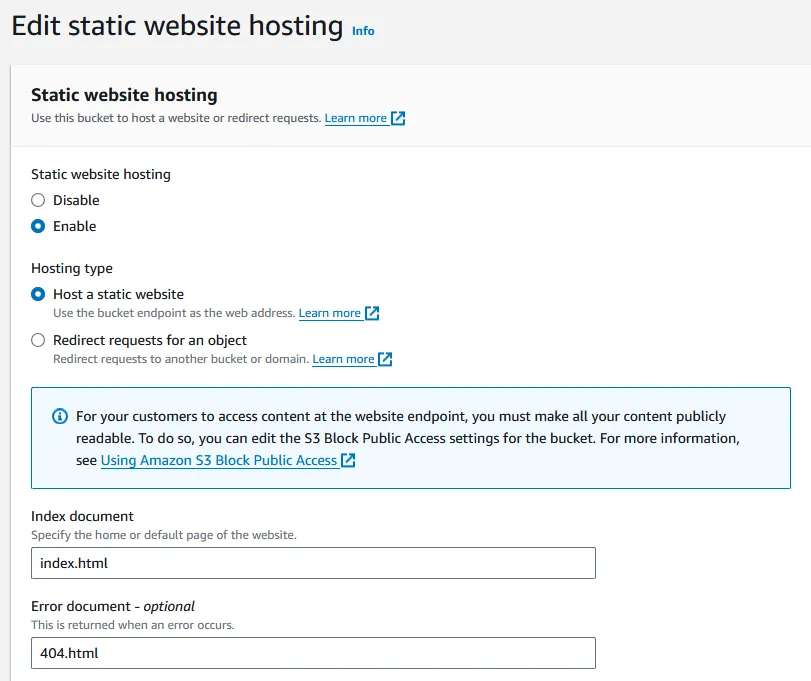
These are the settings that I used. I simply enabled static website hosting and then specified my index.html and error document. These will usually be your home page, and also your error page. The error page is just something it will serve if someone tries to request a page that doesn’t exist. For Astro the error document is 404.html.
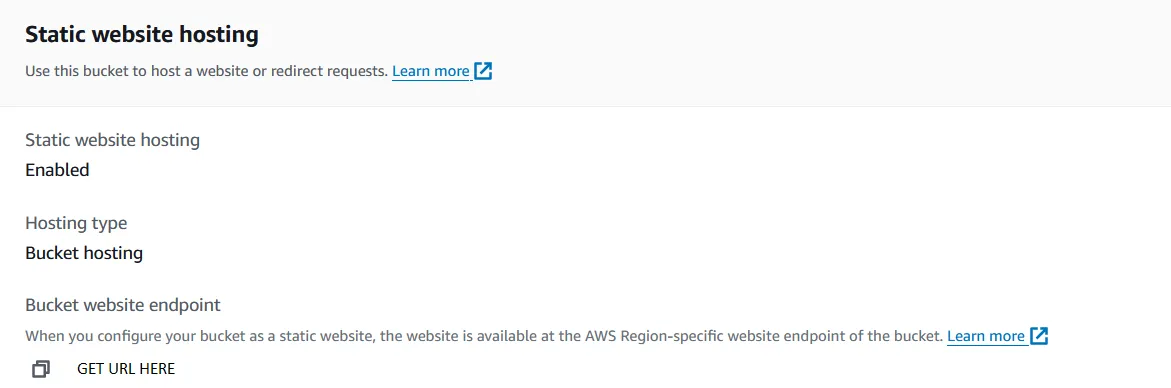
Now, after enabling, you can scroll down and see the default URL for the S3 bucket. Make a note of this as we will use this later.
Upload Files
Now you can upload your files. You can do this through one of two ways, through the web-based UI that we have been using, or if it’s easier, copy the build files in the right directory to your S3 bucket using the following command and AWS CLI.
aws s3 cp <your_files> s3://<your_bucket_name>/ --recursiveFor the latter option, you will need to have the AWS CLI configured.
Once the files are uploaded, you should see them in the web UI under the Objects Tab.

Accessing the Site (or can we?)
Now you can try accessing the site using the link provided, but if you do, you will get a 403 Forbidden. This does not inspire joy. Bet you thought we were almost done lol.
Why is this?
Most services in AWS are private by default but can be configured to provide unauthenticated or anonymous access. Just because we have enabled static hosting doesn’t make this visible. This is a cool security feature to make it more difficult to misconfigure S3 buckets. Let’s grant permissions using a bucket policy.
Configuring the Bucket Policy
To enable anyone to view our site, let’s enable access using a bucket policy. Let’s first go back into the bucket, and then click on the Permissions tab next to Properties. Policies are honestly their own topic all together so I won’t be going too much into detail, and you can just copy paste the policy to follow along.

{
    "Version": "2012-10-17",
    "Statement": [
        {
            "Sid": "PublicRead",
            "Effect": "Allow",
            "Principal": "*",
            "Action": "s3:GetObject",
            "Resource": "arn:aws:s3:::dshcodes.com/*"
        }
    ]
}
Essentially the basics of what this is, is it allows anyone to publicly read it using the wildcard (*). This means this will apply to any principal trying to access the bucket, and they have permissions to get objects. The resource that this anonymous access policy applies to is our S3 bucket. Be sure to replace dshcodes.com with your own bucket name.
Accessing the Site, Part 2
Now if we click on the bucket link provided, it should work. Yay! This does inspire joy.
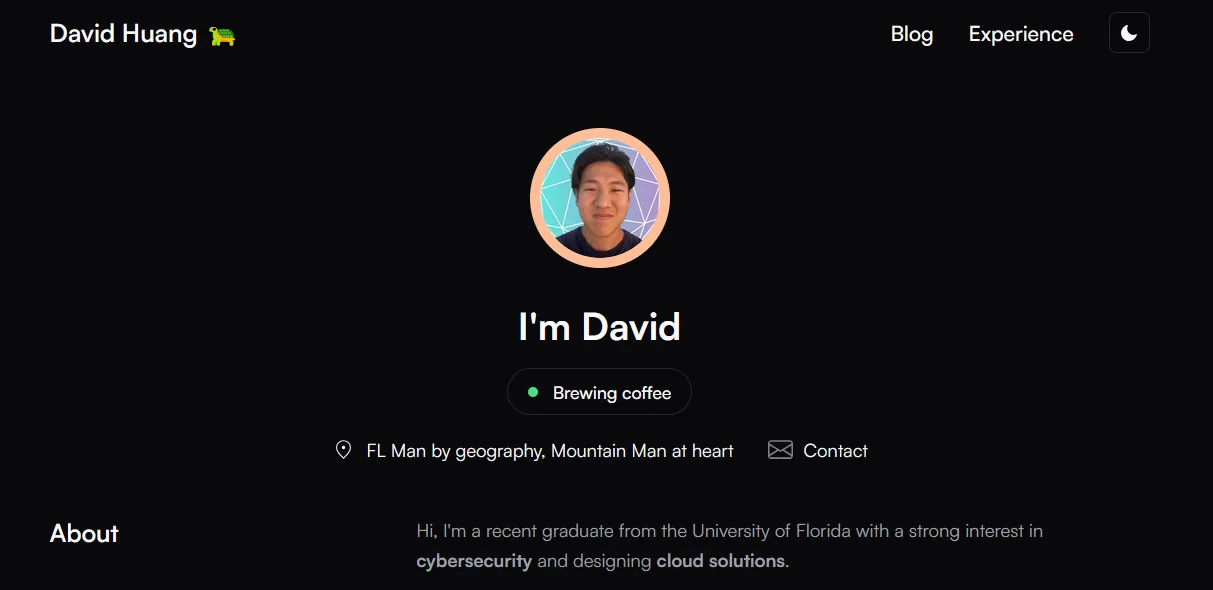
Now we can see that the website can be accessed using the bucket URL, but it still doesn’t look like a typical URL. We want to access it using something short and sweet, like dshcodes.com, not a complicated string that will be impossible to search for.
Setting Up CloudFront
This part is a bit complicated, but we should do this before setting up Route53 for simplicity and also so it redirects to HTTPS for security purposes. We went into CloudFront a bit at the beginning, but this essentially provides CDN capabilities which will help in terms of performance (fast site delivery) and also cost.
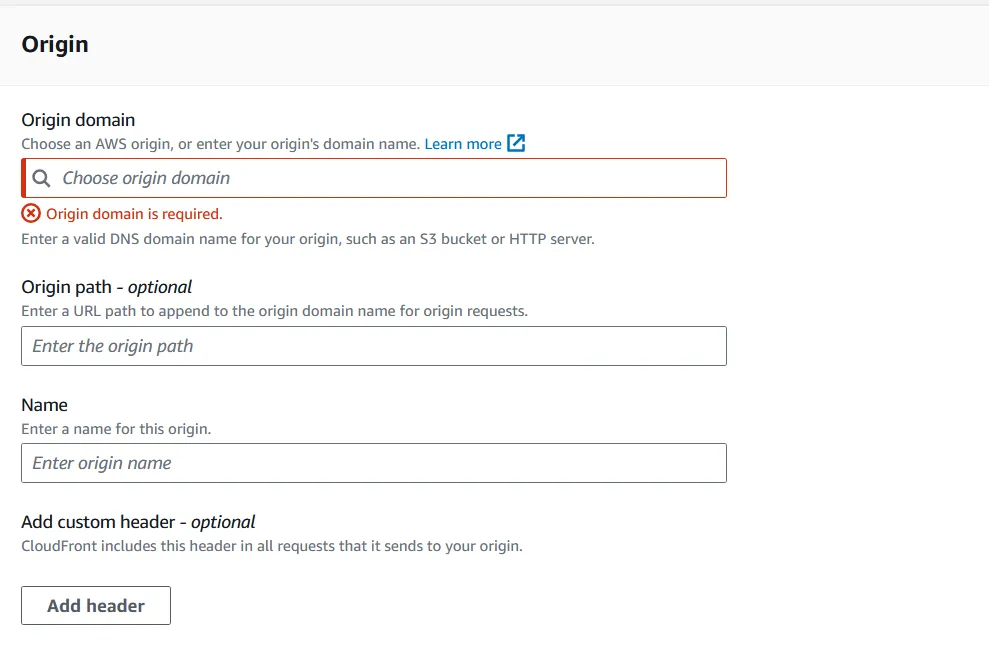
To do this step, let’s set up a CloudFront distribution by creating a distribution.
First, set the Origin domain to our S3 bucket URL. This should pop up if you select the drop down.
Then, we want to select redirect HTTP to HTTPS under Viewer Protocol Policy.
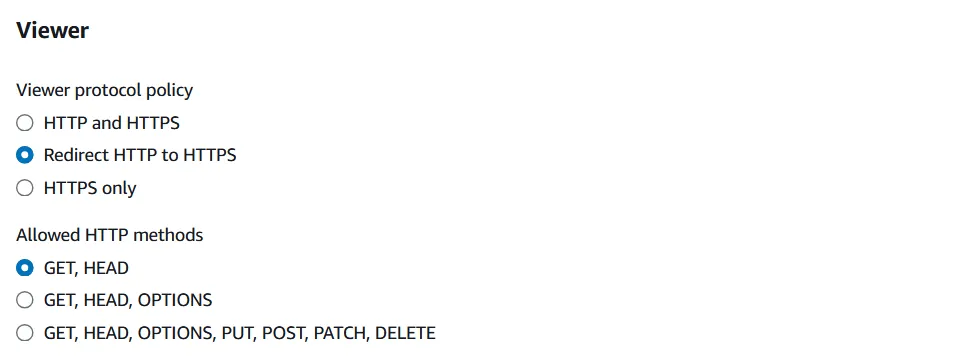
For this, to set up a DNS record, I do believe you need to request a certificate or use a certificate. This basically proves that you own the site and is also a complex topic, but for our purposes knowing that is enough. You can choose a preexisting one or request one and then follow the steps, but the process is fairly fast. This section is definitely not comprehensive, and I definitely do not completely understand DNS, but if you find setting this up interesting you can do some further googling. I will also do more research and perhaps expand on this section one day.

Now after this has been created, we want to select our distribution, and copy the distribution domain name.
Route53
Now let’s set up our website so we can access it securely through our domain. To do this, we will be using Route53 which provides DNS solutions.
For this part, you might have to have the domain registered using Route53, if not I believe whatever provider you chose may have their own solution, but I will use Route53 to keep things simple.
Let’s go to Route53 and select our Hosted Zones, and our website should pop up.

Now we will add a routing record. Again DNS is a very complex topic, but essentially what we are doing is, we will set up a type A record (IPv4) to route to our CloudFront distribution that we created, and through that users can view our site.
We will simply create a record, select type A and route traffic to our CloudFront distribution.
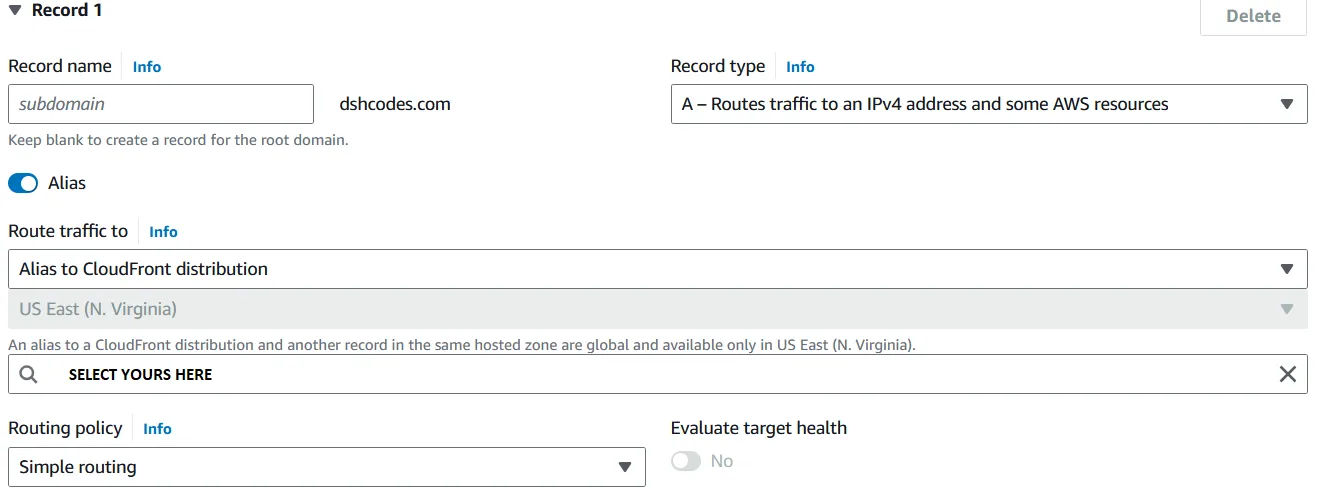
Now we should be able to finally access our website!
Some Notes
To extend this, you could create a CI/CD pipeline using GitHub actions to add updates, but essentially this is it. This is my first article, so if anyone has additional information to add or suggestions, I would definitely be open to hearing them. Thanks for reading!